Asset Class and Asset Subclass
Objective: Gain an understanding of how to create Asset Classes and Asset Subclasses.
Admin Users can add or edit Asset Classes and Asset Subclasses in the Administration module. This is typically completed during the initial configuration stage of an environment, to ensure those options are available for selection when creating or updating Assets.
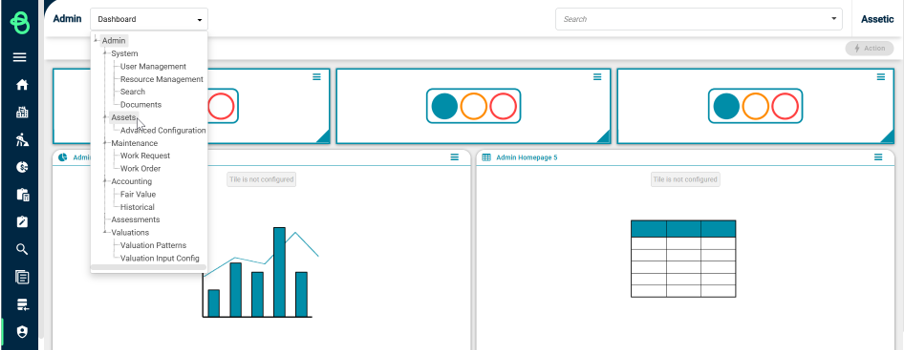
Login to Assetic and select 'Admin' from the Navigation Sidebar.
In the 'Admin - Dashboard’, select 'Assets' from the Navigation Dropdown.
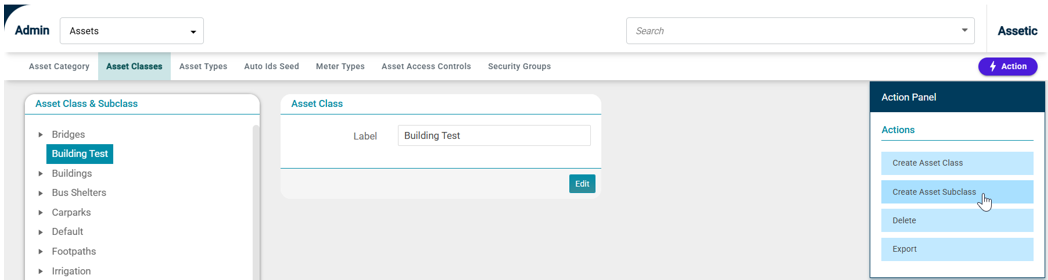
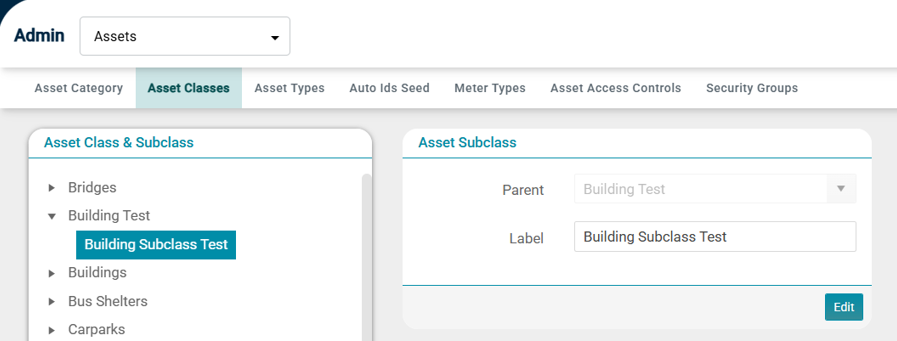
Select the ‘Asset Classes’ tab to load the Asset Classes page. In the main window on the left there is a hierarchy tree called ‘Asset Class & Subclass,’ and it lists all Asset classes alphabetically.
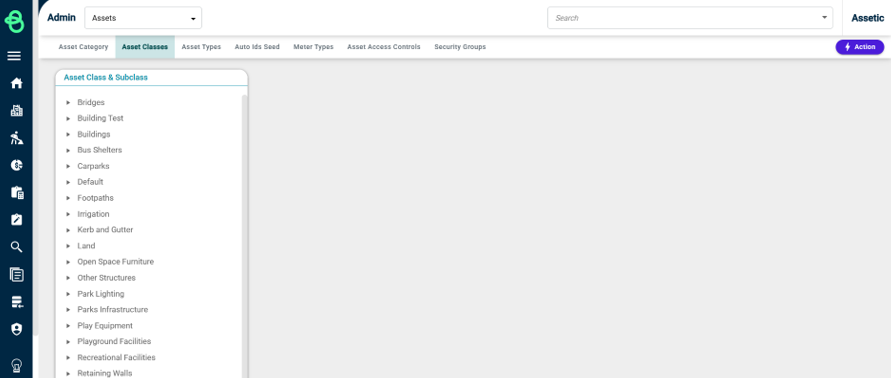
Select the 'Actions' panel on the top right corner.
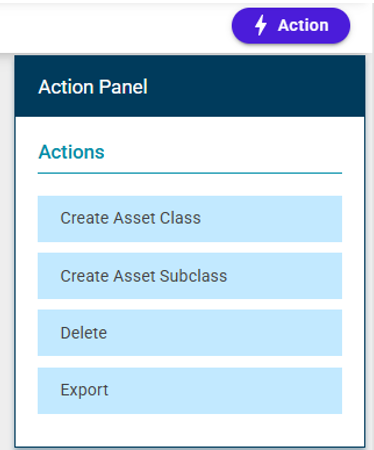
In the 'Actions' panel, users can 'Create Asset Class', 'Create Asset Subclass', 'Delete' a classification, as well as export the page.
NOTE An Asset Class or Subclass cannot be deleted if the classification is currently being used by an Asset (This includes Disposed or Out of System Assets).
Create Asset Class
Select 'Create Asset Class' in the 'Actions' Panel.
A pop-up window, 'Create Asset Class' will appear.
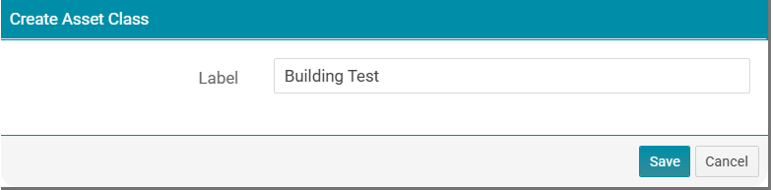
Populate the Label field, in this example, we will call it ‘Building Test’ and select the ‘Save’ button.
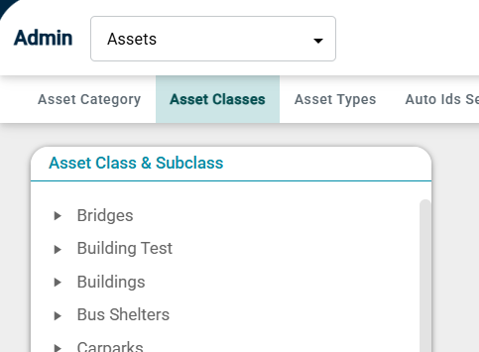
A system message stating ‘Successfully added Asset Class’ will appear at the bottom right corner of the screen, confirming the action.
The newly added Asset Class called 'Building Test' can be seen on the left.
Create Asset Subclass
The next step is to add an Asset Subclass to this Asset Class.
Select ‘Building Test’ by clicking on it and then go to the 'Actions' panel and select 'Create Asset Subclass'.
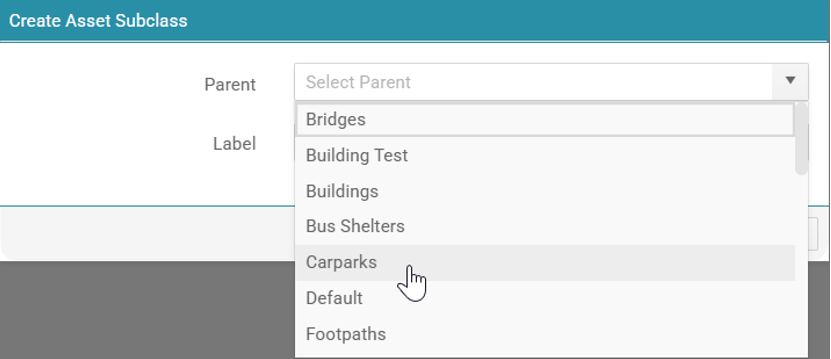
A pop-up window ‘Create Asset Subclass’ will appear. In the Parent field, the ‘Building Test’ has been populated. Users can now create a Subclass that will belong to the parent.
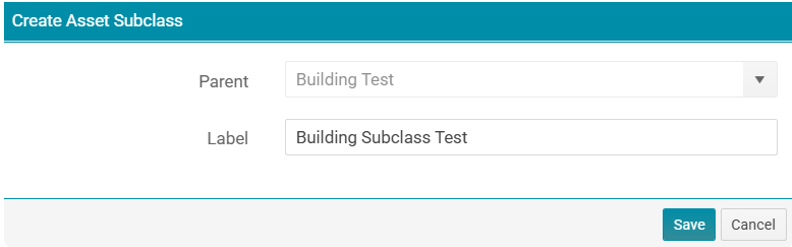
Populate the 'Label' field. In this example, the Asset Subclass is called ‘Building Subclass Test’, and then select ‘Save’.
By scrolling back to our ‘Building Test’ record in the tree, the record can be expanded and the ‘Building Subclass Test’ is visible.
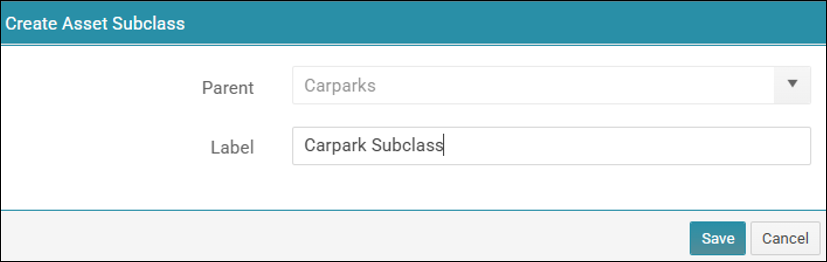
Alternatively, users can manually select a different 'Asset Class' parent from the drop-down menu when creating an Asset Subclass.
Then enter an Asset Subclass label and select 'Save'.
Selecting any Asset Class or Asset Subclass on the hierarchy tree will bring up a window to allow the record to be edited.
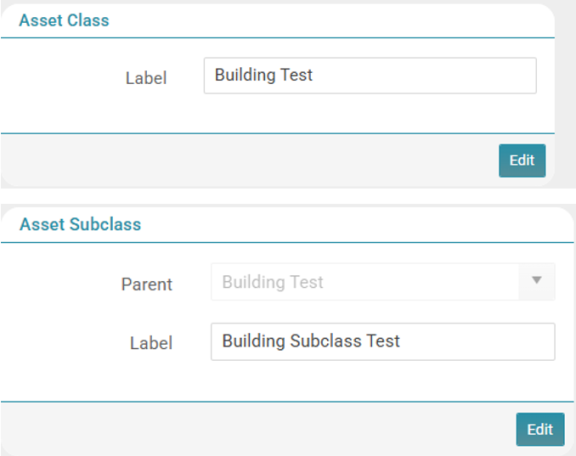
NOTE When an Asset Class or Asset Subclass label is edited, the changes will be reflected across the entire system.
How to Create Asset Class and Asset Subclass
NOTE It is possible for many subclasses to be associated with an asset class.
